Nets of 3-dimensional shapes

0/1
?
Intros
Lessons
  1. Nets of 3-dimensional shapes
    • What are they?
    • How to draw the net for a 3D shape?
    • How to sketch a 3D object out of its net?
0/6
?
Examples
Lessons
  1. Sketch a net for the objects below.

    1. draw the net of a triangular prism

    2. Nets of 3-dimensional triangular pyramid

    3. Nets of hexagonal prism
  2. Sketch the three dimensional figure for the net.

    1. draw the 3d object from its net: rectangular pyramid

    2. Nets of a pentagonal prism

    3. Nets of cylinders
Topic Notes
?
It is possible to represent 3-dimensional shapes into 2-dimensional patterns called nets. If you fold the nets back up, they will be reverted to their original 3-dimensional form. It is way easier to find the surface area and perimeter of a 3D object if we know its net!

Introduction to Nets of 3-Dimensional Shapes

Welcome to our exploration of nets of 3-dimensional shapes! Nets are fascinating 2-dimensional patterns that, when folded, create 3D objects. Imagine unfolding a box and laying it flat - that's a net! These patterns are crucial for understanding the structure and properties of 3D shapes. They help us visualize how surfaces connect and calculate surface area and perimeter. Our introduction video will guide you through this concept, showing how various 3D shapes unfold into their corresponding nets. You'll see cubes, pyramids, and more come to life! This visual approach makes it easier to grasp the relationship between 2D and 3D geometry. As we progress, you'll learn to recognize and draw nets for different shapes, a skill that's invaluable in fields like engineering, architecture, and packaging design. Let's embark on this exciting journey into the world of 3-dimensional shapes and their nets!

Understanding Rectangular Prisms and Their Nets

What is a Rectangular Prism?

A rectangular prism is a three-dimensional shape with six rectangular faces. It's like a box, with length, width, and height. In our example, we'll use a prism with dimensions 10x5x8.

Creating a Net: Unfolding the Prism

A net is a two-dimensional representation of a 3D shape, showing all its faces laid flat. To create a net for our rectangular prism, we need to visualize unfolding it.

Step 1: Identify the Base

Choose one face as the base. In our 10x5x8 prism, let's select the 10x5 face as our base.

Step 2: Unfold the Sides

Imagine "cutting" along the edges and unfolding the prism. The sides will extend from the base like flaps.

Step 3: Arrange the Faces

As you unfold, arrange the faces so they're connected but don't overlap. This creates the net pattern.

Visualization Techniques

To better understand the unfolding process:

  • Use a physical box and carefully unfold it
  • Draw the prism and mark the edges you'll "cut"
  • Use 3D modeling software to visualize the unfolding

Maintaining Correct Measurements

Accuracy is crucial when creating a net. Each face must maintain its original dimensions:

  • Base: 10x5
  • Front and back faces: 10x8
  • Side faces: 5x8

The Importance of Precise Measurements

Correct measurements ensure:

  • The net can be folded back into the original prism
  • Accurate representation of the 3D shape in 2D
  • Proper understanding of the prism's proportions

Common Net Patterns

While there are multiple ways to create a net, some common patterns include:

  • Cross shape: Base in the center, four sides extending out
  • T-shape: Base at the top, sides extending down
  • L-shape: Base at one end, sides unfolding in an L pattern

Practical Applications

Understanding rectangular prism nets is useful for:

  • Packaging design
  • Architecture and construction planning
  • Educational tools in geometry
  • Crafting and model making

Tips for Creating Accurate Nets

To ensure your net is accurate:

  • Use graph paper for precise measurements
  • Double-check all dimensions before cutting
  • Consider adding small tabs for easier assembly
  • Practice with simpler shapes before attempting complex prisms

Conclusion

Creating a net for a rectangular prism involves visualizing the 3D shape unfolding into a 2D pattern. By carefully identifying the base, unfolding the sides, and maintaining accurate measurements, you can create a precise representation of the prism. This skill is not only valuable for understanding geometry but also has practical applications in various fields. Remember, practice and visualization

Creating Nets for Triangular Prisms

Creating a net for a triangular prism is an essential skill in geometry that helps understand the relationship between 3D shapes and their 2D representations. This process involves unfolding the prism into a flat pattern, which can be cut out and folded back into the original 3D shape. Let's explore this concept using a triangular prism with dimensions of 10x7.

To begin, it's crucial to identify the shapes that make up a triangular prism. This 3D shape consists of two triangular bases and three rectangular faces. In our example, the triangular bases have a base of 10 units and a height of 7 units, while the rectangular faces have a width of 10 units (matching the base of the triangle) and a length equal to the prism's height.

The process of creating a net involves mentally unfolding the prism. Imagine cutting along some of the edges to lay the shape flat. There are multiple ways to create a net, but one common method is to keep the rectangular faces connected and attach the triangular bases to opposite ends.

Here's a step-by-step guide to creating the net:

  1. Draw a rectangle representing one of the long faces of the prism. This will be 10 units wide (the base of the triangle) and as long as the prism's height.
  2. Attach two more rectangles of the same size to either side of the first rectangle. These represent the other two rectangular faces of the prism.
  3. At one end of this strip of rectangles, draw a triangle with a base of 10 units and a height of 7 units. This is one of the triangular bases.
  4. At the opposite end of the rectangle strip, draw another identical triangle. This forms the other base of the prism.

Understanding the relationship between the 3D shape and its 2D net is crucial for spatial reasoning and problem-solving in geometry. It helps in visualizing how flat materials can be folded to create three-dimensional objects, which is valuable in fields like packaging design, architecture, and engineering.

To better visualize the folding process, try these tips:

  • Use color coding: Assign different colors to each face of the prism in both the 3D representation and the 2D net. This helps track how each part folds.
  • Practice with paper: Cut out the net and physically fold it into the prism shape. This hands-on approach enhances understanding of the spatial relationships.
  • Use dotted lines: On your net drawing, use dotted lines to indicate where folds will occur. This helps distinguish between cut edges and fold lines.
  • Create a mental map: As you unfold the prism in your mind, try to maintain a clear picture of how each face relates to the others.

Mastering the creation of nets for triangular prisms is a stepping stone to understanding more complex 3D shapes. It develops spatial awareness and the ability to transition between 2D and 3D representations, skills that are invaluable in many areas of mathematics and real-world applications. By practicing this process with various dimensions and exploring different net configurations, you'll enhance your geometric intuition and problem-solving abilities.

Exploring Nets of Cubes

Understanding the process of creating and visualizing nets for cubes is a fundamental skill in spatial reasoning. A cube net is a two-dimensional representation of a three-dimensional cube, showing all its faces laid out flat. Let's explore this concept using a 2x2x2 cube as an example. To create a net for this cube, imagine unfolding it by cutting along some of its edges until all faces lie flat on a surface. For a 2x2x2 cube, each face would be a 2x2 square.

Visualizing the folding process is crucial. Start with the net laid out flat and mentally "fold" the squares back into a cube shape. This mental exercise helps develop spatial awareness and understanding of three-dimensional objects. For the 2x2x2 cube, picture how the four side faces would fold up around the base, and how the top face would complete the cube when folded over.

Interestingly, a cube can have multiple valid net configurations. For a standard cube, there are 11 distinct net patterns. Each of these patterns, when folded correctly, will form a complete cube. This variety in configurations highlights the complexity of spatial relationships and the importance of flexible thinking in geometry.

Understanding cube nets is important for several reasons. Firstly, it enhances spatial reasoning skills, which are crucial in fields like architecture, engineering, and design. Secondly, it helps in problem-solving tasks that involve packaging, where understanding how shapes unfold and refold is essential. Lastly, it provides a foundation for more complex geometric concepts and three-dimensional thinking.

Practicing with cube nets can improve one's ability to mentally manipulate shapes and understand spatial relationships. This skill is not only academically valuable but also practical in everyday life, from assembling furniture to efficiently packing a suitcase. By exploring different net configurations and practicing the mental folding process, individuals can significantly enhance their spatial reasoning abilities and geometric understanding.

Nets of Cylinders: A Unique Challenge

Creating a net for a cylinder presents a unique challenge in geometry, as it requires combining two-dimensional shapes to represent a three-dimensional object. Unlike simpler shapes such as cubes or pyramids, a cylinder's net involves both curved and flat surfaces, making it an intriguing subject for students and mathematicians alike.

The net of a cylinder consists of two main components: a rectangular side and two circular bases. The rectangular side represents the curved surface of the cylinder when it's "unrolled" and laid flat. This rectangle's width is equal to the circumference of the cylinder's circular base, while its height matches the cylinder's height. The two circular bases, identical in size, represent the top and bottom of the cylinder.

To illustrate the process of creating a cylinder's net, let's consider the example from the video. Imagine a soup can as our cylinder. If we could carefully cut along the side of the can and unroll it, we'd end up with a rectangular shape. This rectangle, when combined with the circular top and bottom of the can, forms the complete net of the cylinder.

The unique aspect of a cylinder's net lies in how these components come together. The rectangular side needs to be precisely sized so that when rolled, its edges meet perfectly to form the cylinder's curved surface. The circular bases must be attached to the top and bottom edges of the rectangle in a way that allows them to fold inward and form the cylinder's ends.

Visualizing and drawing cylindrical nets can be more challenging compared to other shapes for several reasons. First, the curved surface of a cylinder must be represented as a flat rectangle, which requires understanding the relationship between the cylinder's circumference and the rectangle's width. This concept can be abstract for many learners.

Secondly, accurately drawing the circular bases and ensuring they are the correct size in proportion to the rectangular side can be tricky. It requires precise measurement and a good grasp of scale. Additionally, positioning the circular bases correctly on the net so that they align properly when folded is crucial for the net to form a perfect cylinder.

Another challenge lies in understanding how the net will fold to create the three-dimensional shape. Unlike a cube's net, where all faces are squares or rectangles, a cylinder's net requires visualizing how a curved surface will form from a flat rectangle. This spatial reasoning skill can be difficult to develop and often requires practice and hands-on experience.

Despite these challenges, mastering the creation of cylindrical nets is valuable. It enhances spatial awareness, improves understanding of geometric relationships, and develops skills in measurement and proportion. These abilities are not only crucial in mathematics but also find applications in fields such as engineering, architecture, and product design.

Practical Applications of Nets in Surface Area Calculations

Nets play a crucial role in calculating the surface areas of 3D shapes, offering a simplified approach to what can often be a complex mathematical problem. By unfolding a three-dimensional shape into its two-dimensional net, we can more easily visualize and compute the total surface area. This method is particularly useful in geometry, engineering, and various real-world applications where understanding surface area is essential.

A net is essentially a flattened out version of a 3D shape, showing all its faces in a single plane. This 2D representation allows us to see all the surfaces of the shape at once, making it easier to measure and calculate areas. For example, the net of a cube consists of six equal squares, while the net of a cylinder includes two circles (the top and bottom) and a rectangle (the curved surface when unrolled).

When using nets for surface area calculations, the process typically involves these steps:

  1. Identify the 3D shape and visualize its net
  2. Draw or unfold the shape into its net
  3. Calculate the area of each face in the net
  4. Sum up the areas of all faces to get the total surface area

Let's consider a practical example: calculating the surface area of a rectangular prism. The net of a rectangular prism consists of six rectangles - two each for the length, width, and height. By measuring these rectangles in the net, we can easily calculate their individual areas and sum them up. This method is much simpler than trying to measure and calculate each face while the shape is in its 3D form.

The relationship between the net's 2D representation and the 3D shape's surface is direct and proportional. Every face in the 3D shape corresponds to a 2D shape in the net, and the sum of these 2D shapes' areas equals the total surface area of the 3D object. This relationship holds true for all types of 3D shapes, from simple cubes to more complex polyhedra.

Nets are particularly useful in problem-solving scenarios where direct measurement of a 3D object is difficult or impractical. For instance, in architecture, engineers can use nets to determine the amount of material needed to create a box or container. In architecture, nets can help in calculating the surface area of complex structures for purposes such as painting or insulation.

Here are some tips for effectively using nets in surface area calculations:

  • Practice drawing nets for various 3D shapes to improve spatial visualization skills
  • Use graph paper to accurately draw and measure nets
  • Label the dimensions on each face of the net for clarity
  • Double-check that all faces of the 3D shape are represented in the net
  • Remember that some shapes can have multiple valid net configurations

In conclusion, nets serve as an invaluable tool in simplifying surface area calculations for 3D shapes. By transforming complex three-dimensional problems into more manageable two-dimensional representations, nets make it easier to visualize, measure, and compute surface areas. This approach not only aids in mathematical problem-solving but also has practical applications in various fields where understanding and working with 3D shapes is essential. Mastering the use of nets can significantly enhance one's ability to tackle surface area problems efficiently and accurately.

Conclusion: Mastering Nets of 3-Dimensional Shapes

In exploring nets of 3-dimensional shapes, we've uncovered the crucial link between 2D representations and 3D objects. This concept is fundamental to spatial reasoning and geometry. The introduction video provided a solid foundation, demonstrating how nets unfold and reconstruct various 3D shapes. Remember, mastering this skill requires consistent practice and strong visualization abilities. As you continue your journey, challenge yourself with nets of different shapes, from simple cubes to complex polyhedra. This practice will enhance your spatial awareness and problem-solving skills. The applications of this knowledge extend beyond mathematics, influencing fields like engineering, architecture, and design. We encourage you to keep exploring, experimenting, and applying these concepts in real-world scenarios. By doing so, you'll develop a deeper understanding of geometry and its practical uses. Don't hesitate to revisit the introductory material and seek out additional resources to further your learning. Your growing expertise in nets of 3D shapes will prove invaluable in many aspects of your academic and professional life.

Example:

Sketch a net for the objects below.
draw the net of a triangular prism

Step 1: Understand the Shape

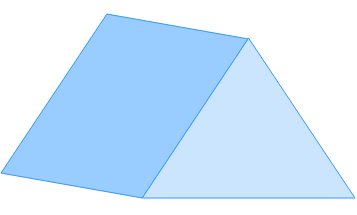
First, it's important to understand the shape we are dealing with. In this case, we have a triangular prism. A triangular prism has two triangular bases and three rectangular faces connecting the corresponding sides of the triangles. Imagine you have this 3D shape in front of you and you want to unwrap it to form a 2D net.

Step 2: Identify the Components

Next, identify the components of the triangular prism. There are two triangular faces and three rectangular faces. For simplicity, let's assume the triangular faces are equilateral triangles, meaning all sides are of equal length. This will help in visualizing and drawing the net accurately.

Step 3: Draw the Triangular Faces

Start by drawing one of the triangular faces. Since the prism has two triangular faces, draw another identical triangle. Place one triangle at the top and the other at the bottom of your drawing space. These triangles represent the front and back faces of the prism.

Step 4: Draw the Rectangular Faces

Now, draw the three rectangular faces. These rectangles connect the corresponding sides of the two triangles. Place one rectangle between the two triangles, representing the bottom face of the prism. Then, draw two more rectangles on either side of the bottom rectangle. These represent the side faces of the prism.

Step 5: Connect the Faces

Ensure that all the faces are connected properly. The two triangles should be connected to the three rectangles. The bottom rectangle connects to the base of both triangles, and the side rectangles connect to the sides of the triangles. This forms a continuous net that can be folded back into the original 3D shape.

Step 6: Verify the Net

Finally, verify your net by mentally folding it back into the triangular prism. Ensure that all faces align correctly and that the net forms the original 3D shape without any gaps or overlaps. If everything aligns correctly, you have successfully sketched the net of the triangular prism.

FAQs

What is a 3 dimensional shape?

A 3 dimensional shape, or 3D shape, is an object that has length, width, and height. Unlike 2D shapes which are flat, 3D shapes occupy space and have volume. Examples include cubes, spheres, cylinders, and pyramids.

How to explain 3D shapes for kids?

To explain 3D shapes to kids, use everyday objects as examples. A ball is a sphere, a box is a cuboid, and an ice cream cone is a cone. Encourage them to touch and hold these objects to feel their depth. Use simple terms like "sides" and "corners" to describe features, and compare 3D shapes to 2D shapes they already know.

What are the 2 and 3 dimensional shapes?

2D shapes are flat and have only length and width, such as circles, squares, triangles, and rectangles. 3D shapes have length, width, and height, giving them volume. Examples of 3D shapes include cubes, spheres, cylinders, cones, and pyramids. The key difference is that 3D shapes occupy space, while 2D shapes do not.

What are the names of 3 dimensional shapes?

Common 3D shapes include: cube, cuboid (rectangular prism), sphere, cylinder, cone, pyramid, prism, tetrahedron, octahedron, and dodecahedron. More complex shapes include torus, ellipsoid, and various polyhedra. Each shape has unique properties in terms of faces, edges, and vertices.

How To Describe 3D Shapes?

To describe 3D shapes, focus on their key features: faces (flat surfaces), edges (where faces meet), vertices (corners), and overall form. Mention the shape of the faces (e.g., square faces on a cube), the number of faces, edges, and vertices. For curved shapes like spheres or cylinders, describe their circular or curved surfaces. Also, note any symmetry or unique characteristics of the shape.

Prerequisite Topics

Understanding the foundation of any mathematical concept is crucial for mastering more advanced topics. When it comes to studying nets of 3-dimensional shapes, having a solid grasp of prerequisite topics is essential. One of the most important prerequisites for this subject is the surface area of prisms. This fundamental concept plays a pivotal role in comprehending how 2D representations of 3D shapes work and why they are so important in geometry.

The study of nets of 3-dimensional shapes is an exciting and practical area of geometry that bridges the gap between two-dimensional and three-dimensional thinking. To fully appreciate and understand this topic, students must first become proficient in calculating and conceptualizing the surface area of prisms. This prerequisite knowledge forms the backbone of working with nets, as it provides the necessary skills to visualize how flat surfaces come together to create three-dimensional objects.

When we talk about the surface area calculation of prisms, we're essentially discussing the total area of all the faces of a 3D shape. This concept is directly related to nets because a net is nothing more than the unfolded version of these faces laid out flat. By understanding how to calculate surface area, students gain insight into the relationship between the 2D representation (the net) and the 3D object it forms.

For instance, when working with the net of a cube, students who are well-versed in surface area calculations can quickly recognize that the six equal squares in the net correspond to the six faces of the cube. They can apply their knowledge of surface area to verify that the total area of the net matches the surface area of the resulting 3D shape. This connection between surface area and nets is crucial for developing spatial reasoning skills and geometric intuition.

Moreover, the study of surface area of prisms introduces students to the concept of lateral and total surface area. This distinction becomes particularly relevant when working with nets, as it helps in understanding which parts of the net represent the lateral faces and which represent the bases of the 3D shape. Such knowledge is invaluable when constructing or analyzing nets of more complex prisms and other polyhedra.

Another important aspect of studying surface area as a prerequisite is that it familiarizes students with the properties of different 2D shapes that make up the faces of 3D objects. This knowledge is directly applicable when working with nets, as students need to recognize and manipulate these 2D shapes to form accurate representations of 3D objects. For example, understanding how to calculate the area of rectangles, triangles, and other polygons is essential when dealing with nets of various prisms and pyramids.

The skills developed while learning about surface area calculations also enhance problem-solving abilities that are crucial for working with nets. Students learn to break down complex shapes into simpler components, a strategy that is directly applicable when analyzing or constructing nets of 3D shapes. This analytical approach is invaluable when students encounter more challenging problems involving nets, such as determining whether a given net can fold into a specific 3D shape or creating nets for irregular polyhedra.

Furthermore, the study of surface area of prisms often involves working with formulas and algebraic expressions. This mathematical foundation is extremely beneficial when students progress to more advanced topics in nets of 3-dimensional shapes. They may need to calculate dimensions of nets based on given surface areas or vice versa, requiring a solid understanding of the relationships between linear measurements and area.

It's also worth noting that the concepts learned in surface area calculations provide a springboard for understanding more advanced topics related to nets, such as volume calculations and cross-sections of 3D objects. As students progress in their geometric studies, they'll find that their foundation in surface area continually supports their learning of new and more complex concepts.

In conclusion, the importance of mastering the surface area of prisms